Composition Principles: Form
Composition refers to the arrangement of elements within an artwork. Although art is largely an intuitive practice, by breaking down and putting a spotlight onto individual elements we can evaluate and elevate our art. This series focuses on the principles within composition, so you can cherry-pick your favourite ideas and level up your art practice.
Let’s dive into today’s topic: FORM!
FORM
The form of an object is commonly used in reference to three-dimensional, sculptural artwork. Today we’re looking at how flat artworks can create the illusion of form through an understanding of light.
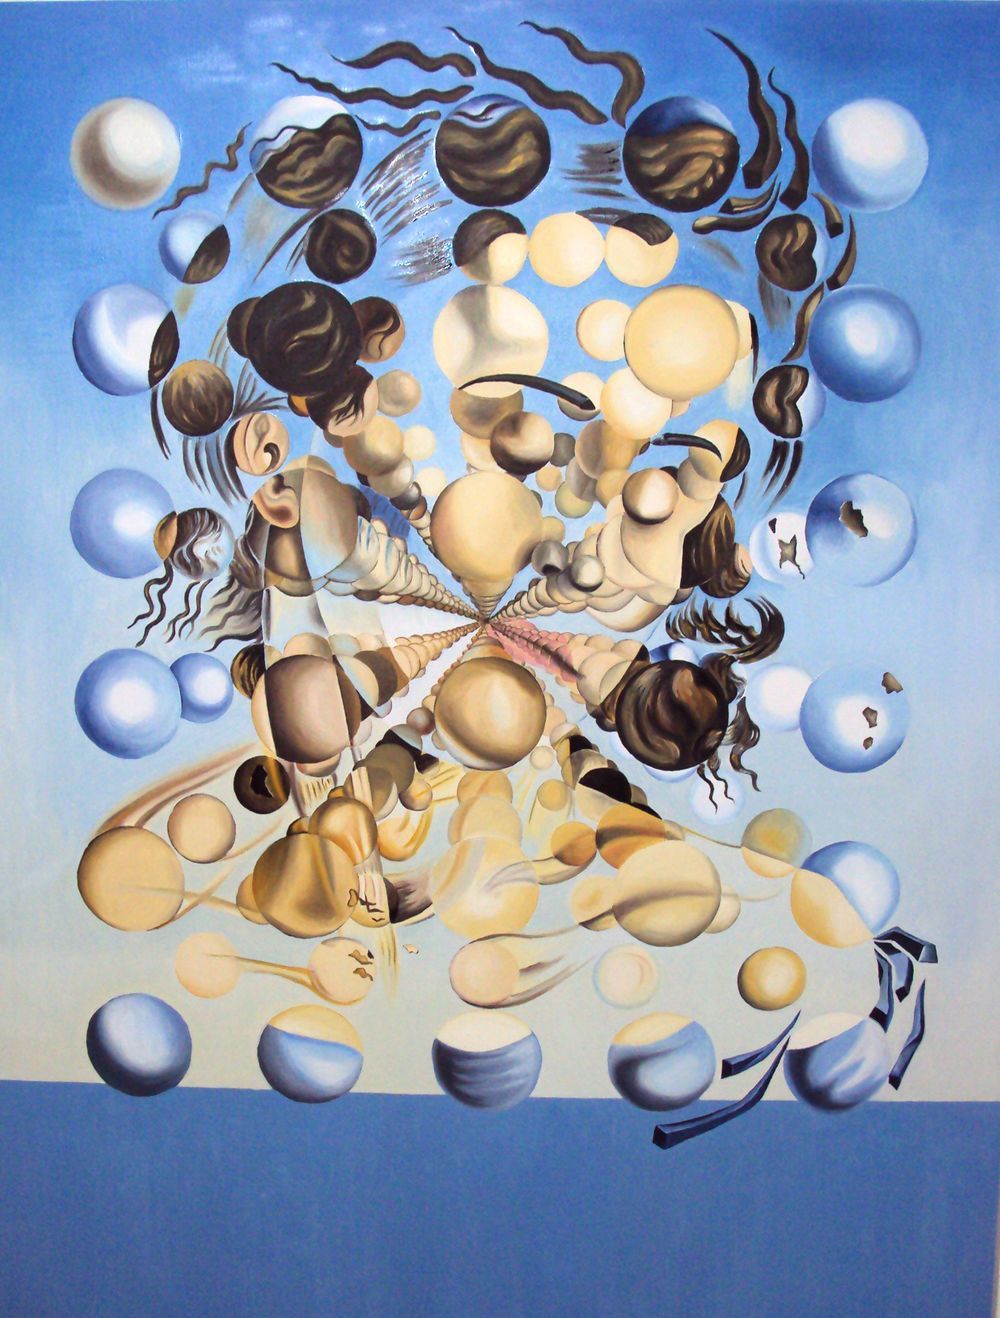
SALVADOR DALI – Galatea Of The Spheres
Dali creates the illusion of spheres by employing light and shadow and contouring.
SHAPE TO FORM
When shape acquires depth, it’s given the illusion of three-dimension and becomes a form. Two-dimensional pieces can have the illusion of form when the artist uses perspective or shading. Examples include, a circle becoming a sphere, a square a cube, or a triangle a cone or pyramid (source).
My entry on space does a deep dive into perspective if you want to check that out!
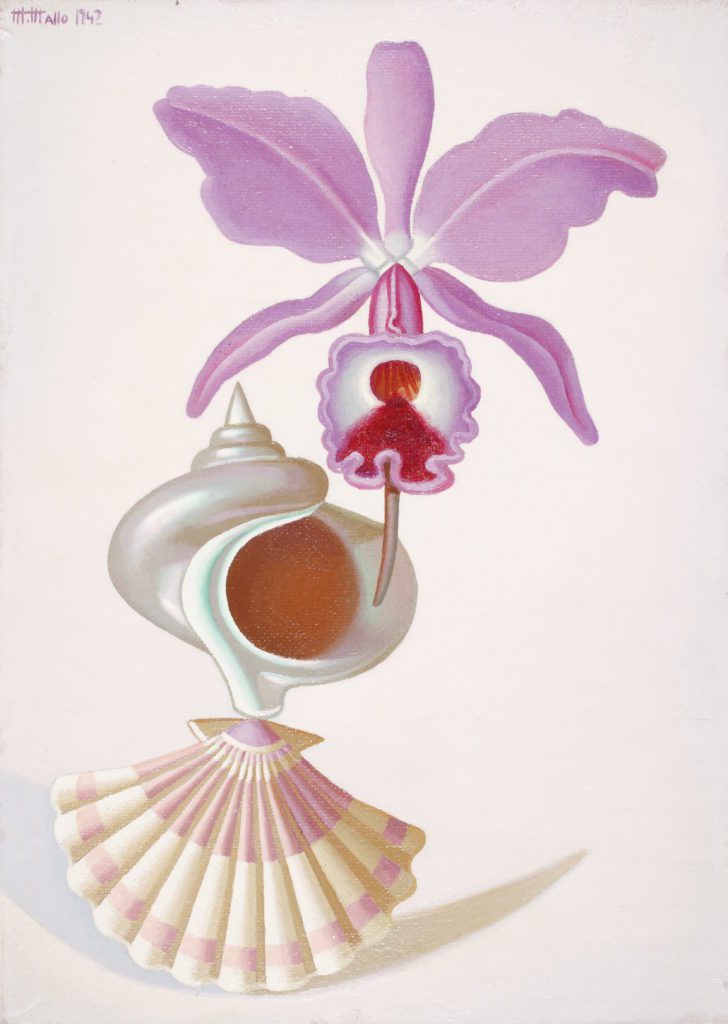
MARUJA MALLO – Naturaleza Viva
Maruja adds shading to the organic forms of the shells. You can see how the orchid with less shading appears flatter.
Geometric and Organic Forms DEFINED
Geometric forms are forms constructed using geometry, such as pyramids, spheres, cones, and cubes. Organic forms are generally smooth, irregular or asymmetrical, and cannot easily be constructed using geometry (source).
Until the emergence of modern art, when colour became its rival, form was the most important element in painting and was based above all on the human body. In modern art the idea grew that form could be expressive even if largely or completely divorced from appearances.
Light
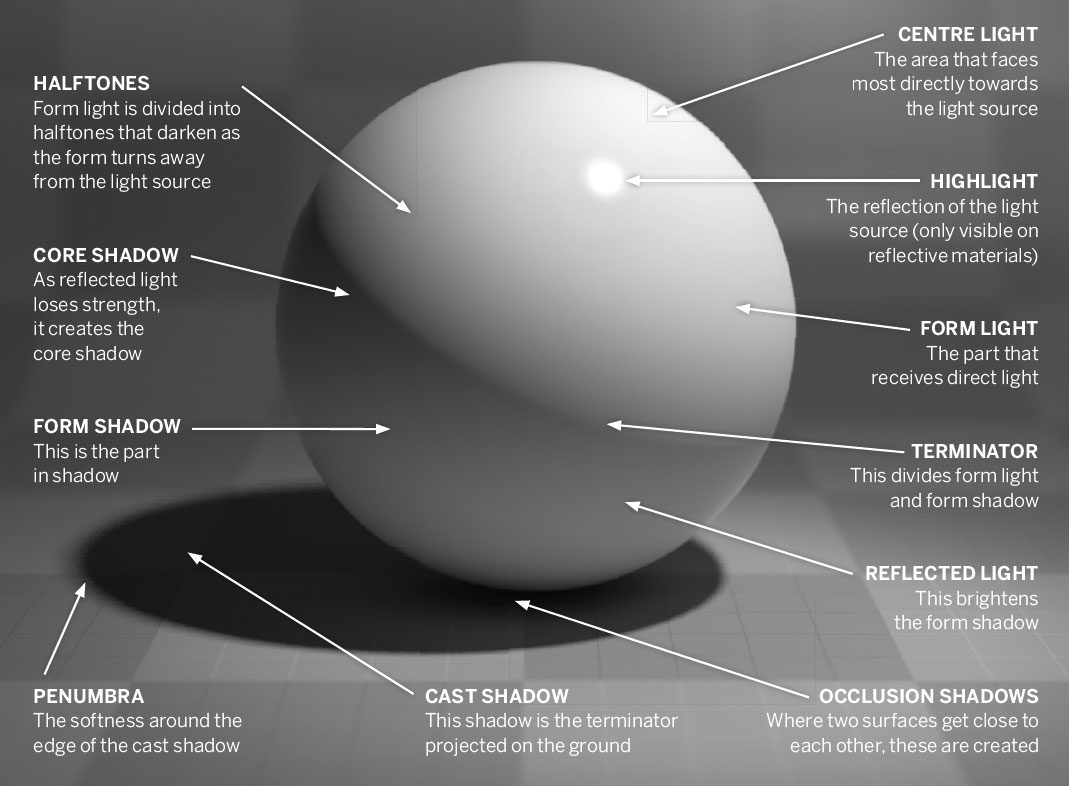
When drawing representationally, the goal is to create the illusion of form. We can create the illusion of form by understanding how light reacts on the object.
Center light: the area most exposed to the light source.
Highlight: a reflection of the light source seen only on reflected surfaces.
Terminator: divide from light to shadow
Form Shadow: area that is shaded on the object
Cast Shadow: the shadow caused by the object blocking the light source
Reflected light: light can bounce back, causing the shadow to lighten
To achieve this in your own work you need to first identify the light sources/s. Where is the light coming from? It could be one source (one window, one lamp, the sun) or multiple light sources. To get a better understanding of the concept, at the bottom of this post is a fun homework challenge for you to do, where you’ll learn how to apply light and shadow to your work.
HOMEWORK
Your homework this week is to practice shading and go deeper into understanding how light interacts with objects by watching two videos and having a no-pressure sketch play! This first video is a great overall video to watch. This second video goes a little deeper but will up your realism game even more. After watching the videos pick one simple object and sketch the tones. You don’t need anything fancy just a pencil and paper and some observational skills. To make things easier, choosing a bright close light source will make the contrasts stronger and more obvious!
BONUS POINT: In your daily life, start paying attention to how light hits random objects and the subsequent shadows that appear. Notice how the distance and the brightness of the light will alter the results!
–
Want to see what else I do? Come peek over on my insta or grab a freebie when you sign up to my newsletter below 🙂 🙂